Posts

Showing posts from November, 2022

On with the toggles and into the shed

Image
I turned a couple of toggles on my lathe, and then (with some help) moved the boat into the shed for the time being. I need to sand the epoxy flat and varnish the deck, and also paint the hull and cockpit.

I hate epoxy

 When I coated the deck with glass fibre and epoxy, I think I made a mistake. As far as I  know, epoxy must be added to a previous coat before it has cured completely so the two layers can bond chemically. Alternatively, the previous coat can be sanded to give it a 'key. if it has already cured. I was aiming for the first scenario, but for whatever reason the top coat did not stick. I had no choice, really - I had to scrape and sand down to a solid base (the glass fibre in this case).  I have completed this, sanded with 60 grit and recoated with (hopefully) a final coat of epoxy.

Against the clock

Image
We are having some electrical work done soon, and the contractors will need access to the garage... so the boatbuilding is now against the clock. I have fitted the rubrails (lots of nails) and I have also cut out the two deck hatches (not shown in the photo) using a tiny router bit in my Dremel, and then a piece of junior hacksaw blade. Today I made and fitted the bits that the hatches fit into, and these will get epoxied into place in two 'sittings'. I hope to move the boat to the shed at the end of the week... Some of the top epoxy coat on the deck delaminated as I was cutting out the hatches - It may have been better to cut these out before glassing the deck. 

Clampathon

Image
  This should be the last time I need to get all my clamps out as I glue on the trim that goes around the top of the cockpit coamings.  After this I need to fit the rubrails, fit the hatches and start the painting an varnishing work.

Getting crowded

Image
  I am now fitting the comings - the bits that go around the cockpit. The pieces provided in the kit are dead straight, and there is no way that they would fit neatly to the carlins.  I ended up clamping then in place, marking them and cutting them as shown in the red outline below. The coming will be a bit lower, but the do fit... I will do the final trim with a block plane and a router with a trimming bit once everything is set The garage is getting mighty crowded as I am also making up the rubrails - they are about 6m long so need to curl up into the roof just to fit!

Deck (and a small regret)

Image
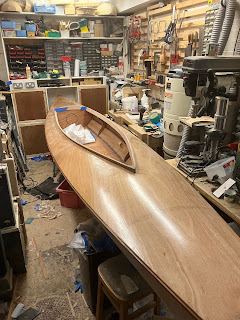
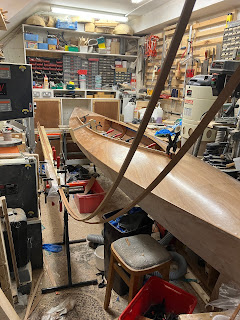
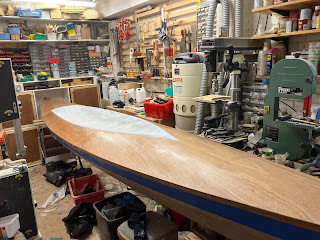
  I have been thinking about whether or not to add a layer of glass cloth to the deck. Pro - stronger, Con and bit heavier. In the end I decided to go for it, but followed some advice from the internet (laughing loon) to seal the wood first with a thin coat of epoxy. It was good advice, but as I was rolling it on, some darker stripes appeared on the deck. These were in the locations where I had used some straps to tie down the deck while I was nailing it into place. They had been completely invisible on the unfinished wood - I guess that something from the strap (water? oil?) ended up impregnated in the deck and showed up only in the presence of the uncured epoxy. There is nothing to be done and they will have to be 'regretted'. Before the epoxy had fully cured, I put on the layer of glass. I used a roller, rather than a squeegee, and I think  was a good choice. I will trim out the cockpit piece before the epoxy cures fully.

Tragedy (well, a bit sad)

Image
I was planning down the deck overhang when I knocked my block plane onto the floor and it broke.  The 'lever cap' (cast metal top piece that holds the iron in place) snapped and that was the end of that. The reason I'm a bit sad it that it was my Dad's (and possibly my Grandad's before that). So nothing for it but to buy a new one. This one is more adjustable and I am very pleased with it.